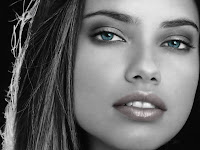
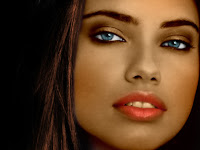
Well for starters I say that this tutorial is a model, from here you can change little things apply other values \u200b\u200band colors, according believe is best for your photo.
I leave here an idea
I leave here an idea
Before I explain the basic or simple makeup consists of three basic steps and simple:
"First create a layer on the bottom layer and this layer paint the area to make up with the color you want.
"Second, this coat will go down the opacity and put it in Multiply blending mode.
And third, to blur this layer apply a Gaussian blur filter
There are three basic steps, but I leave more detailed here:
1. Open the image you want to revamp, and Tenom first thing to do is create a new layer, on which we will begin to make up for it with a brush opacity and flow to 100%. that layer colors on the first part we want makeup, such as rouge. (At first it seems very strange but ends up being a perfect make-up) This layer where we have colored the Multiply blending mode and opacity will go down as much as we deem necessary. To end this part apply to this layer a Gaussian blur filter called (Filter> Blur> Gaussian Blur), with high values \u200b\u200bfor the color that is perfectly divided.
2. This process of creating layer and above it do what we can repeat as many times as we want to make up parts (eyes, lips, hair, etc ...) Anyway ceases at the end of a video tutorial in which I do full makeup .
3. Once we have makeup all parts of the face we want to have to flatten the image (Layer> Flatten Image)
Here we could leave, but if you want that perfect skin with emerging models in the magazines we can pass the blur tool throughout the skin of the face, taking care not to pass for eyes lines eyebrows or the nose, mouth etc ...
4. To finish and give it a more professional, duplicate the background layer, put it in fusion mode Rinse and apply a Gaussian blur filter (Filter> Blur> Gaussian Blur), and remain a fade effect to the image.
5. I personally use a filter called virtualPhotographer free download (in the downloads of this blog you can download) is repido and very simple, you improve the color and appearance of the images dramatically. U can also be applied to the photo to make it perfect.
RESULT:
Here


